Settings reference
Every setting on the unit, what it does, and its default. Open Settings from the bottom of the main menu.
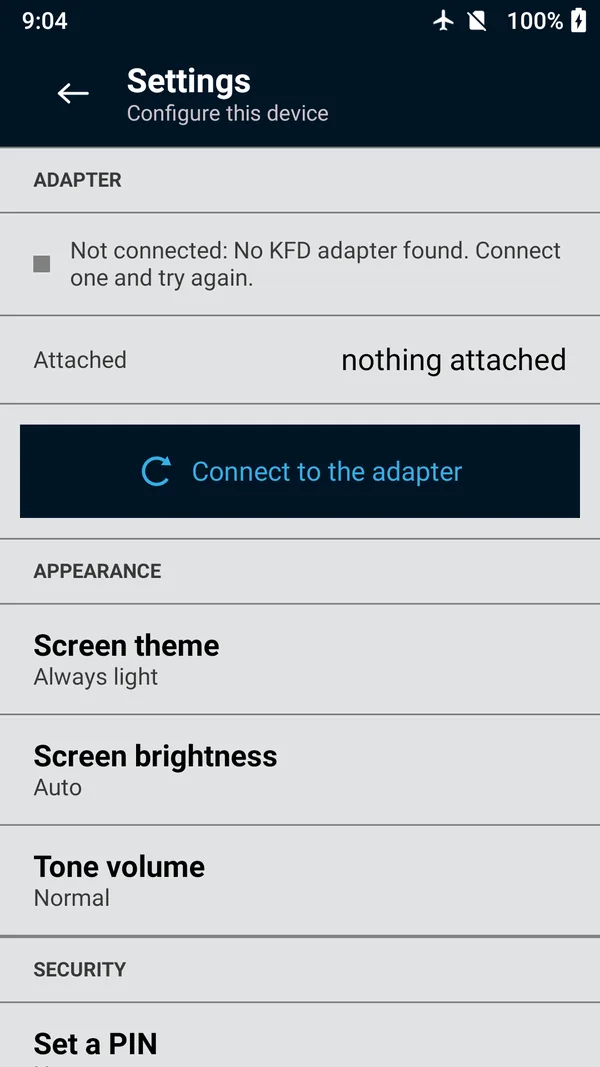
Settings is the last row of the main menu. It is grouped into sections: Adapter, Appearance, Security, Device, Licensing, KMF, Keyloader, Advanced, Link, Network and About. Settings for USB keyloading and radio authentication live on those screens and are covered on their own pages: USB settings and radio authentication settings.
 (enlarge)
Adapter
Shows whether the security adapter is connected and what is attached. Connect to the adapter (or Reconnect to the adapter) retries the connection. The app connects by itself when it starts, so you only need this after a problem.
Appearance
| Setting | Choices | Default |
|---|---|---|
| Screen theme | Always light (easier to read in daylight) or Always dark (easier at night). | Always light |
| Screen brightness | Auto (follows the handset), Dim, Medium, Bright or Brightest. Applies to the app while it is on screen. | Auto |
| Tone volume | Off, Quiet, Normal or Loud, for the app's confirmation tones. The handset's volume keys adjust them too. | Normal |
Security
| Setting | What it does |
|---|---|
| Set a PIN · Change the PIN | A 4 to 8 digit PIN the app asks for every time it starts. See Protecting the app with a PIN. |
| Remove the PIN | Shown when a PIN is set. Asks for the PIN, then removes it. Stored keys are untouched. |
| Logon banner | Off by default, and needs a PIN. When it is on, a Notice screen with your text is shown every time the app starts, and after a log out, before the PIN is asked for. See The logon banner, below. |
| View stored key material | Off by default. While it is on, Show reveals the value of a stored key, and radio authentication keys can be exported as a report. With a PIN set, turning it on and every Show ask for the PIN. Turn it off again when you are done (the row then reads Stop showing stored key material). |
| Reset all settings | Erases everything on the unit: every stored key and group, every setting including any PIN, the KMF jobs and UKEKs, the OTAR groups, the radio authentication key pairs and the audit log. The license is kept. You confirm by swiping Erase everything. Key values can't be recovered afterwards. |
The logon banner
A notice shown before the PIN, for the warning text your organization requires on a device that holds key material. Open Settings › Security › Logon banner. The first row reads Banner is on or Banner is off; tap it to switch. Under Text, type the notice on the standard keyboard, up to 1000 characters. Restore the default text puts back the built-in warning (authorized use only, and consent to monitoring); Clear the text empties it, and an empty banner is skipped.
When it is on, the Notice screen is shown each time the app starts and after a log out, before the PIN is asked for, and Continue is the only way past it. The banner needs a PIN to stand in front of: turning it on without one is refused with Set a PIN first
.
Device
Date and time
The unit's clock stamps the audit log and is used to check the license. The row's subtitle shows the date, time and time zone. Open Date and time: the title reads This device's clock reads …
, and the screen shows the Device time, the Time zone and the Source, Automatic, from the network
or Set by hand
.
To set the clock, tap each field (Year, Month, Day, Hour, Min) and type it on the keypad or use the arrows (hold an arrow to move quickly), then tap Set the clock. The hour is on a 24-hour clock, and Clear starts again from the device's time. Time zone lists every zone the device knows; tap yours. Take the time from the network hands the clock back to the network, which needs a network connection; the radios on the unit are normally off, so set the clock by hand instead. If the screen says the app cannot change the clock on this device, contact support.
Software updates
Where an update package from a USB drive is installed. The row's subtitle says when a package has been found. Updates are free for the life of the unit; the download page, which you reach with your license hash, gives the steps for the version you download. See Software updates.
Licensing
Shows the license Status, who it was Issued to, and the unit's License hash: 12 characters in three groups of four, such as ABCD 1234 5678. The hash identifies your unit. You need it to download software updates and when you contact support. It is an identifier, not a password. Update the license installs a new license file from a USB drive. See Licensing.
KMF
The KMF's RSI, the MNP, the main and backup KMF addresses and ports, and the UKEKs. See Set up the KMF connection.
| Setting | Range | Default |
|---|---|---|
| KMF RSI | 1 to 9999999 | 9999999 |
| MNP | 2 to 65535 | 1000 |
| Active KMF | Main KMF or Backup KMF | Main KMF |
| IP address | An IPv4 address, for the main and the backup KMF | Not set |
| KMF port | 49152 to 65535 | 56765 |
| UKEKs | One each for AES-256, DES-OFB and DES-XL, entered in hex | None |
Keyloader
Keyloader RSI
The keyloader's own individual RSI, sent as the source address of every connection. Open Settings › Keyloader RSI, enter it in decimal (1 to 9999999) and tap Set or the keyboard's check mark; the change applies on the next connection. The default is 9999998. For store and forward it must match this unit's KVL record at the KMF.
Advanced settings
Custom algorithms
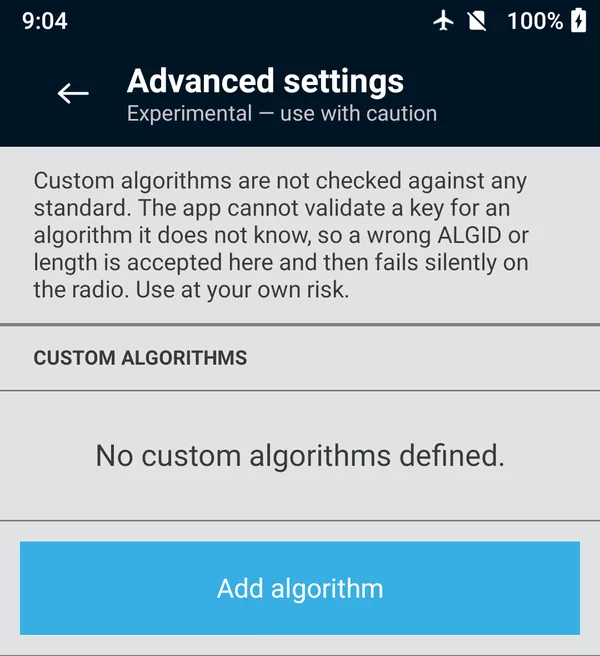
KFDPro includes AES-256, AES-128, DES-OFB, DES-XL and ADP/RC4. If your radios use another P25 algorithm that loads through the standard TIA-102.AACD key fill, including one released after you bought the unit, you can add it yourself at no charge.
Open Settings › Advanced settings and tap Add algorithm.
Enter a Name (up to 16 characters), the ALGID (hex) (00 to FF) and the Key length in bytes (1 to 255).
Tap Add this algorithm and confirm with Save algorithm.
The algorithm then appears wherever you choose one, such as when adding a key. A definition with the same ALGID as a built-in algorithm replaces it everywhere in the app.
 (enlarge)
Key values are your responsibility
The unit checks the length and parity of keys for its built-in algorithms. It can't check a key for an algorithm it doesn't know, so a wrong ALGID or key length is accepted here and then fails without warning at the radio. Adding an algorithm installs nothing in a radio: the radio must already have it.
Restart the app
Closes and reopens the app. Keys, groups and settings are untouched. It isn't available while an operation is running. Try it first if the unit behaves unexpectedly.
Link
Shows the adapter in use, with Disconnect to close the link and Verify communication to check that a radio answers.
Network
A read-only view of the wired network connection used for store and forward and for sending keys to an AuC. The Settings row shows the port and its address, or No wired adapter
. Open Network to see, under Wired network, the Adapter, its Link (Up or Down), its IP address, Subnet mask, Gateway and MAC address. Read again re-reads them; the screen also re-reads each time you return to it.
The adapter's built-in Ethernet port shows here once a cable is connected. On the standalone kit this needs your Android device's support for wired networks, which most devices have; on one without it, the row stays at No wired adapter
. The port takes its address from the network automatically (DHCP); there is no static addressing on the unit. If your network needs the unit at a fixed address, have your network administrator reserve one for the adapter's MAC address on the DHCP server.
About
The app version, as X.Y.Z (build N)
, and the security adapter's identity, read from it when it connects: Model, Serial number, Hardware revision, Firmware and Adapter protocol. Have these to hand when you contact support, together with your license hash. If no adapter is connected, the screen says so and offers Connect to the adapter.